


It’s a given that not all your prints are going to be perfect, especially on your first time around.3d printing house There will be times when even a simple model just won’t come out properly.
Sounds frustrating, right? You’re not alone.
Many of us have faced problems with our 3D printers. This is why you’re reading this article, after all. Because we compiled this guide of all the most common 3D printing problems you’ll ever encounter and the possible solutions to your dilemma.
So, take heart and look for your issue below.
Common 3D Printing Problems

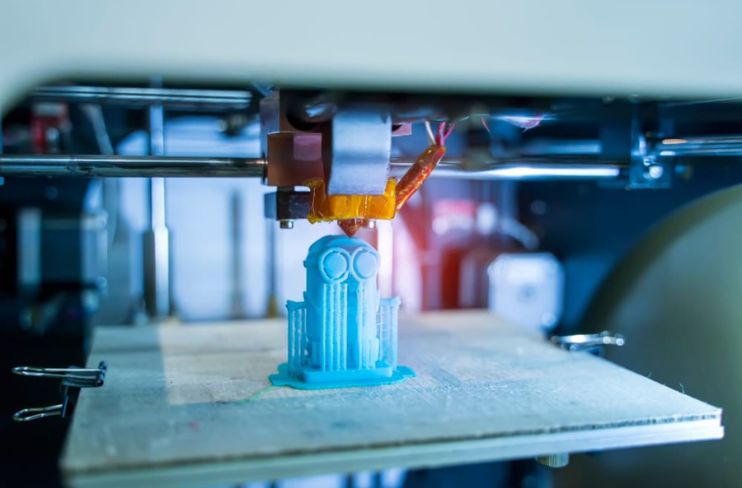
Image by fh-media
First Layer Issues
Your first layer is the foundation of your 3D-printed model. It is the layer that needs to adhere properly to the build plate while the rest of the model is being printed. Obviously, if you have an issue with your first layer, you’re bound to not get that perfect print. Below are some problems that can occur when printing your first layer.
- Nozzle is too close to the bed
You know your nozzle is too close if the printed line is thinner than it should be, there is excess filament squishing upwards at the printed line’s edges, or when the finished model is difficult to remove from the bed.
Why is this a problem? If the nozzle is too close to the bed, there isn’t enough space to extrude the correct amount of filament. In addition, this can cause your extruder to get jammed.
Fix: Adjust the distance between the nozzle and the bed by the leveling screws of your printer. 3d printing house You can also use a thicker paper stock if you’re leveling the bed manually.
- Nozzle is too far away
Your nozzle is considered too far away if the shape of your extruding line is round instead of pancake-shaped (slightly squished). Or, if the individual lines are not sticking, coming loose, or warping off the build plate.
Fix: Adjust the distance between the bed and the nozzle by loosening the screws on your printer or using a thinner paper stock to manually level the bed.

Image by 3dprintingsystems
Print Not Sticking to The Bed
This is when your print is warping or lifting off the bed because of insufficient adhesion. It is one of the most common 3D printing problems which can be caused by any number of things.
- Platform is not level
This occurs when your nozzle is either too close or too far in different locations across the bed. To fix this, you’ll need to “level” the bed. This means that you need to adjust the distance between the nozzle and the bed, making sure that this distance is equal all across the bed.
Fix: To level a bed, you will need to adjust the screws under the print bed. First, heat up the bed and nozzle to the correct temperature. Move the nozzle to one corner of the bed and slide a piece of paper between the bed and the nozzle. Adjust the bed manually until you feel a bit of drag when sliding the paper under the nozzle. Repeat these steps in all corners of the bed as well as the middle.
- Platform is warped
This is when the bed of your 3D printer is not flat. This is a common 3D printing problem that can be found no matter what type of printer you are using.
To test if your platform is warped, get a straight-edged ruler and put it on the bed. Then, look to see if there is a gap between the ruler and the bed.
Fix: You can’t flatten your bed but there are a few workarounds to solve this problem. Make sure your first layer is very thick like 0.3mm for a 0.4mm nozzle. Or, you can make sure that a small area in the center of the bed has the same bed to nozzle distance. Instead of leveling the bed using the four corners, you just need to make sure that a small area works well for your prints. This is because most people rarely print using the entire bed.

Image by PYoung
- Platform needs cleaning
This is when the bed isn’t spotless. This can be determined by the existence of debris from a previous build on the bed or the appearance of dents at the bottom of the print.
It’s important that you clean the bed regularly to prevent debris from sticking on the bed. Make sure to follow the instructions of the manufacturer. You can use pure acetone or isopropyl alcohol/isopropanol in a high concentration. Don’t use soap and dishwashing liquids as these can leave a residue which can impact adhesion.
- Incorrect print temperature
The incorrect printing temperature while printing the first layer can affect its adhesion to the bed. The lower the temperature, the less adhesion. The higher the temperature, the more adhesion you get. But only to a point, especially with certain 3D printing materials like PLA which has a lower melting point. Make sure to set the temperature within the suggested range provided by the manufacturer and at least 10°C below the glass transition temperature.
- Part cooling fan settings
Your part cooling fan should not be spinning when you’re printing the first layer. You want the individual lines to bond to the bed before drying. To avoid this, you can check the fan settings and make sure the cooling fan is off while printing the first layer.
Nothing is Printing
This could mean one of several things. It could mean nothing is printing even though you’ve already sent the design to the printer. It could be that your print was fine until midway, no filament was extruding on the bed anymore.
The cause of this problem is that the printer is out of filament. Unfortunately, this is not something that is always immediately obvious to the user. That will depend on the type of 3D printer you have. The quickest and easiest fix is to check the filament reel.
Blocked Nozzle
This is another of the most common 3D printing problems. This typically happens when part of the old filament gets snapped off and remains in the nozzle when you load a new one. When you try printing, the old filament prevents the new one from extruding, resulting in a blocked nozzle.
The best way to prevent this from happening is to clean your equipment regularly. You should also be on the lookout for certain signs that point to the presence of old, carbonized filament inside your nozzle. These include small nicks in the outer walls of your model and small changes in print quality.
To unblock the nozzle, you should remove the new filament and heat up the nozzle to melt the old one. Then, use a needle or small pin to clear the hole. Alternatively, you can push the old filament through the nozzle using the new filament.
Print Head Misses The Bed
This is a common 3D printing problem that cannot be missed. The printer will sound an alarm should the printhead go beyond the area of the bed. That “alarm” is comprised of the sounds of the belt, cogs, etc. as they try to print in this state.
What are the causes of this problem? It could be a misconfiguration in the settings or wrong printer selection. It could also be caused by broken or worn-out end stops. To fix this, make sure that you have chosen the correct printer, You may also want to update your firmware and check the end stops.
Cracked Model
Another of the most common 3D printing problems is cracking in prints. The main cause of this issue is airflow – too much of it. This causes the material to cool down faster than it should, causing cracks to appear. If you’re planning on doing some custom 3D printing, you need to make sure that the printer is completely protected from breezes.
Print Sticking Too Much
When your model is sticking too much to the bed, there are a number of reasons why. Your nozzle could be too close. Your bed temperature is too high. You’re using a “sticky” filament.
There are numerous solutions as well, depending on the cause of the issue. If it’s the nozzle is too close, you’ll need to adjust the nozzle to bed distance using the screws on the bed. If the bed temperature is too high, make sure to follow the manufacturer’s recommendations. And if you’re using a material that is sticky, make sure to use a release agent such as PVA glue stick or vinyl-based hairspray coating. Just add a thin layer on the bed to avoid too much sticking.
Warping

Image by 3dprinting.com
Warping is fairly easy to notice. This will typically start at the corners of the print, lifting off the bed. Warping typically occurs when the rate the print is cooling down is much higher than how strong the print sticks to the bed. The higher the difference between the temperature of the printed object is compared to the room temperature, the more warping there is.
To fix this, make sure that the difference between the printing temperature and the room temperature is not great. You either print cooler or raise the ambient temperature.
Over Extrusion
Over extrusion is when there’s too much material coming out of the nozzle. This is quite easy to notice; the lines will be thick and possibly “blobby.” To fix this, you need to recalibrate the settings of your extruder – the steps per mm and the feed rate (extrusion multiplier).
Supports Fell Apart
Supports are a necessary evil when printing complex parts. While these are usually removed after a print has been completed, it is important that they are present while you are still printing your model. If your support structure has cracks or looks uneven, there’s a good chance your model won’t print correctly.
To avoid this problem, make sure that you choose the right type of support for your model. Lines and zigzags are easy to remove but are not rigid. Triangles and grids offer more support but are difficult to take out. In addition, increase support density if needed.